Halloween Felt Garland

We are getting ready for some visitors around here!

It was a bit trickier this year to figure out how to decorate our front door for Halloween. We moved in to an apartment building that is painted sherbet orange. That may sound a bit strange, but living on the coast invites people to paint buildings a wild array of colors. It’s actually a lot of fun to drive around and see all of the pastel blue, yellow and even pink houses that brighten up the scenery.

However, having an orange building with a black door made it a perfect combination for Halloween decorations. You have to let the kids know you are open for business on Halloween, right? I did have a couple of challenges. I couldn’t nail anything in the door or the walls, and I couldn’t go crazy with decorating on the ground or around the door because of restrictions put in place by the property managers. So a door decoration it is!

I made a felt garland to drape around the door and tied a cute sign to the door knocker with orange baker’s twine. I’m sure anyone walking by our building at 2 a.m. would have wondered what the heck I was doing on a step ladder hanging our decorations, but I just had to see the finished product!

The garland was a lot of fun to make, and took only about two hours to construct and sew.

  1. Cut assorted shapes from felt. I doubled-up on the pieces of felt when I cut out the shapes. I free-formed my shapes for the most part and made three sizes of circles and a star, but I did make paper patterns to follow when I was cutting the felt so that the shapes were somewhat uniform in size. I also used pinking shears for variety.
  2. Layout your felt pieces in the order you want, and make sure you vary the sizes, shapes and colors to make for an interesting pattern.
  3. Using a straight stitch, stitch down from the top of the felt through the middle. Near the end of the first piece of felt, add the next piece of felt right next to the bottom of first piece so that you can make one continuous stitch. This is how you create your chain.
  4. Back-stitch over the first piece of felt over to the next piece of felt so that you don’t have to worry about the thread breaking when you hang in your garland.
  5. Stitch together all pieces of your felt garland. You can stitch on ribbon or baker’s twine at the ends of the garland for a nice finish. I used orange baker’s twine (I can’t get enough of the stuff). Now you are ready to hang your Halloween garland and welcome visitors on All Hallow’s Eve!

A Wicked Good Time

It’s that time of year for pumpkins, ghosts, skeletons, zombies, and witches, so it is also the perfect season to read about the life and times of the most famous witch of them all in Wicked: The Life and Times of the Wicked Witch of the West, by Gregory Maguire.

Wicked is such an interesting take on the characters from L. Frank Baum’s classic children’s book, The Wonderful Wizard of Oz. Who would guess you would actually feel sympathy towards Elphaba, the little girl who will grow up to become the infamous Wicked Witch of the West?

I have to admit The Wizard of Oz was my favorite book as a child. My mom and dad said that when it came time to read me a bedtime story, they would cross their fingers and silently hope that I would reach for a different book other than Oz. However, they would read the book over and over to me because I apparently couldn’t get enough of Dorothy and her sparkly red shoes. My parents told me that even when they would try to skip a page so they could tuck me in bed a little faster, I would always interrupt to let them know they skipped a page and asked them to go back and read it again. 

I loved the story so much that my mom decided to throw me a Wizard of Oz birthday. My mom is an elementary school teacher, so with her creative brain you can only imagine what all she made for my big day. She constructed an Emerald City and braided my hair, and I even remember that she took an entire roll of yellow bulletin board paper and rolled in down our driveway so that my friends and I could walk on the yellow brick road.

So in honor of the wonderful memories of the Wicked Witch of the West, Aunt Em and Uncle Henry, Dorothy, Toto, the Tinman, the Cowardly Lion, the Scarecrow, and the Munchkins, take a look at some of the fabulous Wizard of Oz-themed handmade items available by talented members of Etsy:

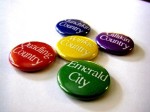
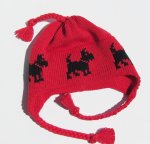
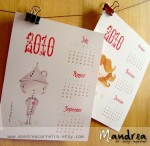
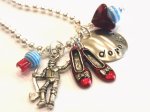
1. Wizard of Oz buttons 2. Cupcake topper kit 3. Infant knit hat with Toto 4. Somewhere Over the Rainbow cowl scarf 5. Wicked Witch original art print 6. Somewhere Over the Rainbow printable calendar 7. Tin Man and Dorothy hand-stamped necklace 8. Yellow Brick Road print 9. Wicked Witch bookmark

You’ve Got Mail…Trick-or-Treat!

My name is Ashley, and I am addicted to Pinterest. There, I said it. If you aren’t familiar with Pinterest, it is an online pin board to post and share your favorite things. I promise you, once you get started pinning to your boards, you can’t stop.

This weekend has been a Pinterest weekend. So far, I have tried out a recipe for Nutella dip, a recipe for baked zucchini sticks and sweet onion dip, and made 13 ounces or less mail. The recipes turned out great, but wait…What was that last one? Let me explain.

Take one of these…

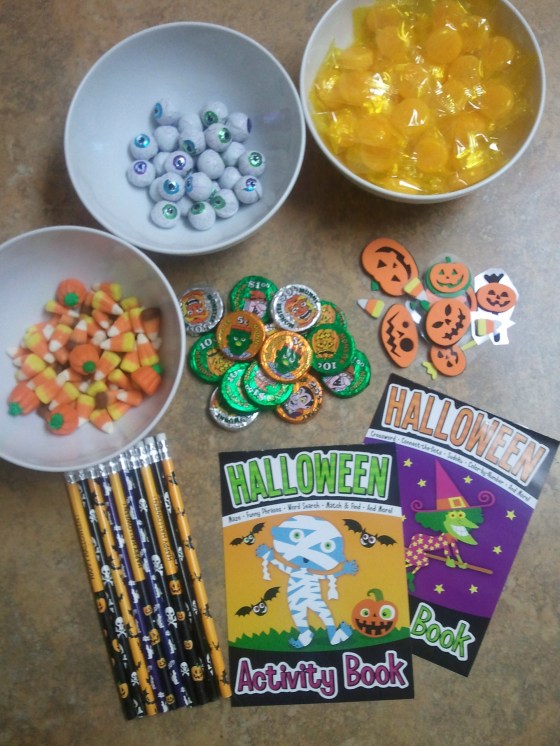
…add these items (forgive the bad quality of the photos, I was using my cell phone):

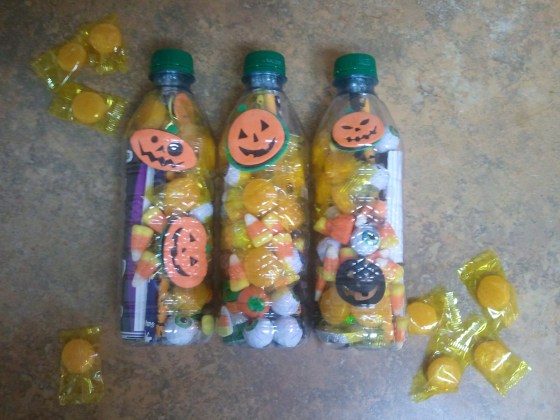
…and voilá! You have these:

Next question: What the heck are these? These bottles are filled with Halloween gifts to mail to my niece and some friends with little ones back in Athens. Since they can’t come and trick-or-treat at our new house four hours away, I thought I would mail Halloween goodies to them.

I wanted to mail something that would be a surprise the moment they opened their mailboxes, so I started looking around on Pinterest for ideas. I ran across this great pin called “13 ounces or less,” which linked me back to this fabulous post on Giverslog about thinking outside of the box –literally– when it comes to mail. I had no idea you could actually mail a rubber ball, flip-flops, plastic Easter eggs, and water bottles filled with toys and candy in the mail!

For my Halloween-themed mail, I included chocolate eyeballs, butterscotch, candy corn, chocolate coins, pencils, stickers and activity books. It was a lot of fun to do, but let me give you a little advice if you try this:

  • Use a water bottle with a flat bottom. I tried using an empty Coke bottle and an empty Cheerwine bottle, but the grooves and curves of the bottles kept shifting things around. SmartWater bottles would probably work best.
  • Cut a slit vertically in the middle of the bottle to insert the larger items. It was easier to start inserting larger items and then add the smaller items. Cover the slit with clear packing tape once all of the items are in the bottle, and then stick the mailing label around the center of the bottle.
  • You can mail items that are 13 ounces or less as first-class mail. I weighed each filled bottle at 9 ounces a piece and calculated the postage on the USPS website. I can mail each bottle for less than three dollars!
  • Be careful! I scratched up my hands a good bit inserting all of the toys and candy in just the right places, so I suggest using some long tweezers or even a hemostat to help push and pull items in to place.

I hope my favorite little ones enjoy their trick-or-treat by mail. Happy Halloween!

Welcome to the Lowcountry!

So I ended up taking a bit of a blogging break. The Dutchman and I have been on a bit of a rollercoaster lately, and it seems as if the ride is finally beginning to slow a bit. Not that I am complaining. We have big news…We packed up our lives and moved from the Classic City to the Lowcountry! From Athens, Georgia, to Beaufort, South Carolina, to be exact.

Beaufort, South Carolina

Here’s how it all happened: The Dutchman graduated from nursing school and successfully passed his boards. After weeks and weeks of pounding the pavement for jobs, one of us finally caught a break. The local hospital in Beaufort called and wanted to interview him immediately for a job as a surgical nurse. Two days later, we drove down to Beaufort for a whirlwind one-day trip so that we could visit the area and he could participate in his formal interview.

Now I am not one to be superstitious, but let me just say there were “signs” that this job for the Dutchman and our move to the coast was meant to be…

Sign 1: “Eye of the Tiger” by Survivor (greatest pump-it-up song ever!) played on the radio before he went in the hospital for his interview, and he came out with a big grin on his face after meeting with the hospital staff.

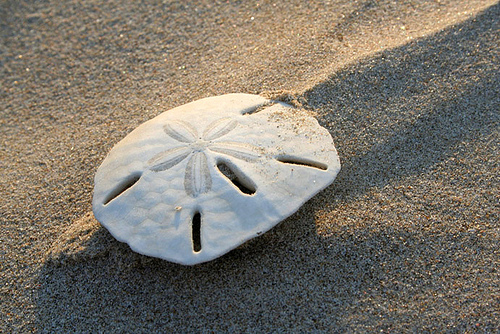
Sign 2: After his interview, we decided to go dip our toes in the Atlantic Ocean before we drove the four hours back to Athens that evening. We saw a lady walking on the beach with a beagle and a lab/mutt mix that reminded us of our little four-legged children (we have a beagle, a lab, and a mutt). I also found an intact dried sand dollar during low tide on the beach. I have always wanted to find one, and the Dutchman kept it in his pocket for safekeeping for me.

Sign 3: A move is always a precarious thing in that you wonder if you made the right decision to totally pack up your life and move away from all that feels comfortable and normal. New town, new people, new everything. However, we got our answer to this question not long after we moved to Beaufort.

On our first day to really go out and explore Beaufort and Port Royal Island, we wanted to take pictures to send back to our family and friends. We had no idea where to start, and as luck would have it this is the first photo I took:

Rainbow over the bay in Beaufort, South Carolina

Welcome to Beaufort. Home sweet home!